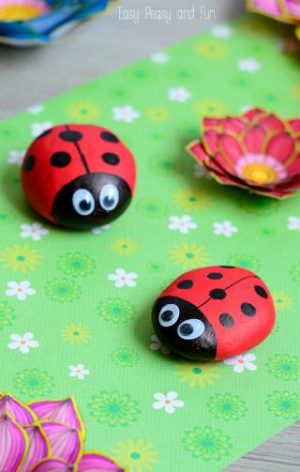
 It’s the beginning of spring, and I’ve noticed so many ladybugs in the yard! Here is a fun activity for your kids to make their own.
You will need:
- Smooth round or oval rocks, washed and dried
- Acrylic craft pain in colors of your choice
- Black acrylic craft paint
- 2 wiggle eyes for each ladybug
- Black permanent marker
- Acrylic matte sealer spray
- White craft glue (recommended: Tacky Glue)
How to make them:
- Completely wash and dry all rocks.
- Paint rocks in desired colors; allow to dry. Apply second and third coats if needed. Lighter colors will require more coats than darker shades.
- Paint head on using black acrylic craft paint. There is no pattern needed; simply paint about ¼ of the rock black in the “front.”
- Use a black permanent marker to draw a straight line down the center of the rock, starting at the center of the base of the “head.”
- Dip the end of a large paintbrush, or the eraser of a pencil, in black craft paint. Dot on the spots, reloading with paint after every dot.
- Once the paint is dry, spray the rock(s) with acrylic sealer spray. Allow sealer to dry completely.
- Using white craft glue, attach wiggle eyes and let dry.