By Leigh Marcos
The Christmas vacation is immense fun, but it can also be exhausting when your kids are home from school and getting bored without the stimulation of classes. Getting creative in preparation for Christmas is a great way to keep your children occupied, and the sense of achievement they get from completing a project is wonderful to see. They can give their finished projects as meaningful gifts to family and friends, and you can use others as interesting and personal house decorations for a fraction of the store price!
Before you start
If you’re unsure whether these projects are suitable for your child’s age range, or are planning on using them in a community setting, check out this art and craft safety guide at https://www.cpsc.gov/s3fs-public/5015.pdf for more information.
Too early?
If you’re not ready to prepare for Christmas festivities yet, don’t worry. It’s definitely possible to do great art projects, regardless of season, on a low budget with simple resources. Without further ado, here are three, low-cost art projects to keep your children happy this Christmas.
1. Winter Collage
 This one’s particularly good if the weather’s not too bad and your family are getting tired of being stuck inside. Take a long walk in the park or in the country and gather up small but interesting items in different colors, textures, and shapes.
Once back at home, get a large piece of card and some strong glue or tape and arrange your finds on it in a creative way. You can use gold or silver spray, miniature tree baubles, ribbon, and other materials to give the arrangement that finishing touch. Mount on the wall for a surprisingly artistic addition to the Christmas décor.
2. Simple Sock Snowmen
 These cute little Christmas accessories are a great way to while away a stormy afternoon with your kids. Start out with a pair of clean, old white socks and a bag of rice or dried peas. Cut off the tops (the ankle section) and put them aside for later. Pour some rice into the toes of the sock and then tie to create the snowman’s head. Pour in some more and tie again.
Raid the sewing box and stick on buttons for the jacket and add pins for eyes and nose. Tie off the ends you set aside earlier and roll up the edge to create cute little hats. Add a thin strip of material from another cast off item of clothing for a bright little scarf. You can enjoy these as a perfect centrepiece for your table, or dotted around the sideboard. You could get creative and try and make some Santas next!
3. Christmas Cookies
 Combining cooking and crafts, Christmas cookies are great fun to make and delicious to eat on cold winter evenings. Use your normal cookie recipe and invest in some festive cookie shapes – or you could invent the shapes freehand if you like. Add gold, silver, green, or red sprinkles, festive icing, or anything else you fancy to create a tasty, low-cost, and engaging activity for the whole family to enjoy.
4. Felt Pinecone Owls
 Allow the unique shape of each pinecone to dictate the manner in which your owl presents itself, with a shorter and wider pinecone becoming an inquisitive and curious young owl seemingly leaning forward in anticipation of new information to be learned. A taller and more upright pinecone might become a stately older owl, but each pinecone conveys something different to each individual artist.
This project can be completed with pinecones, felt, and glue, with the felt being used to create the owl’s face and wings. For the owl’s feet, brown pipe cleaners serve as the perfect representation and also create a stable base on which the owl can rest.
5. Treasure Chests
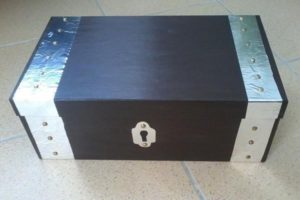 A sturdy shoebox and a few sheets of paper can be quickly transformed into a treasure chest in which you and your kids can store art projects, pictures, or whatever else is deemed worthy of storage within a treasure chest of your own creation. Decorate the exterior of the box in whatever fashion you would like, and then simply accordion-fold a long strip of paper before gluing the first and last pages to the lid of the treasure chest and the bottom of the treasure chest.
When the box is opened and the accordion-folded paper is fully extended, the contents of the treasure chest will be completely revealed. This is a project that you and your kids can add to again and again, as some of the pages can simply be left blank until an item worthy of inclusion within the chest is created or discovered. When the treasure chest is full, a new treasure chest art project can be started all over again.
6. Mason Vacation Jars
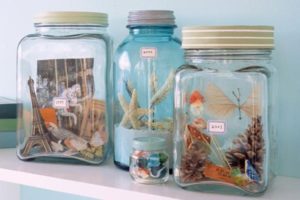 A large mason jar or a recycled glass jar is perfect for housing all the trinkets and pictures acquired while on vacation or away on some other exciting adventure. Souvenirs and other representative objects can be lowered and secured in place with a wire bent for this specific purpose along with some glue (the objects do not have to be glued and can be rearranged from time to time). This particular project is a fun and artistic way to document your family’s unique experiences, and it also serves as a way to be more mindful and thoughtfully engaged during your family’s travels together since you will all be thinking about a potential theme for the mason vacation jars you will be working on upon your return home.
7. Potato and Apple Prints
 Potatoes typically used for baking can be easily transformed into a stamp for printing custom designs on cotton t-shirts or canvas bags. After slicing the potato in half lengthwise, take a cookie cutter with the design you and your kids wish to transfer to a bag or t-shirt. Carefully push the cookie cutter all the way through the potato and then poke the potato-stamp out of the cookie cutter. Make sure to remove any excess moisture by blotting the stamp with a paper towel, and now you have a perfect paint transfer stamp. Flowers, letters, numbers, stars, and polka dots can all be transferred via potato stamp to a t-shirt or bag.
Apples are similarly ideal for paint transfer projects, as the cut side of an apple half results in a pleasing design that looks really great when repeated in a pattern with bright colors. Simply cut an apple in half and use a brush to apply the color paint you and your kids would like transferred onto a bag, t-shirt, or even a backpack. You could even make some pretty tablecloths! Add details like leaves and stems by using permanent markers.
8. Painted Canvas Shoes
 White canvas shoes are widely available and are often exceptionally cheap, making them the perfect surface for painting whatever happens to strike your kids’ fancy. Fabric paint and paint pens work well on canvas shoes, allowing your kids to personalize their footwear through this fun and creative art project. Polka dots matched with laces of a complementary color or even a red canvas upper paired with black spots (like a ladybug) represent just a tiny percentage of the multitude of design options available to you and your kids through this inexpensive art project.
9. Newspaper Art
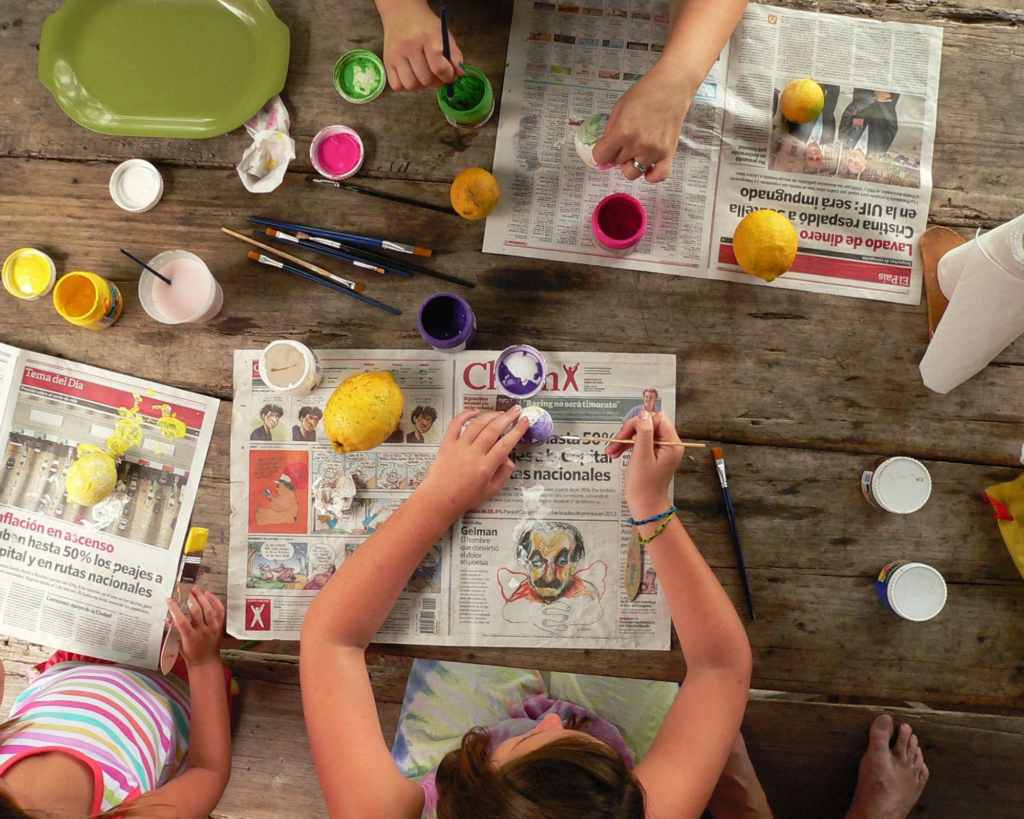
 Old newspapers are the perfect background material for watercolor or tempera paints, and there is something about the aesthetic of newspaper text that is just fundamentally appealing. A single sheet of newspaper can be affixed to any kind of backing, with a small canvas board being an excellent option. Mod Podge works well to secure the newspaper firmly in place without wrinkling or tearing, but regular glue is effective if carefully applied. Once the newspaper background is applied, the painting options are truly limitless.
For younger children, you may want to trace the outline of a favorite animal with a permanent marker and allow your kids to do the coloring with watercolors or tempera paint. Allowing some of the original newspaper to be visible through negative space creates a nice contrast with the opacity created by the Mod Podge and paints, and this technique can be used over and over again for a multitude of other art projects.
10. Rock Animals
 With just a few rocks and some acrylic or tempera paints, you and your kids can undertake a truly unique art project that yields some truly distinctive rock animals. After collecting plenty of rocks and stones of varying sizes and shapes, have your kids pick out the rocks that will best suit the animal they wish to make. It is worth mentioning, however, that the rocks will sometimes dictate the animal that is ultimately created.
Once your kids have all of the rocks they need to create their animal, you can help them glue the pieces together so they remain firmly in place for painting. Once secure, you can add whatever features you choose through the use of paint. A minimalist approach in which eyes and a beak, for example, is often enough to clearly represent the animal, but your kids can be as creative as they like in painting their rock animals.
Rocks and paints can be used for other fun art projects as well, as flat rocks can be made into a set of dominoes or refrigerator magnets and larger rocks can be made into bookends and doorstops.
Leigh Marcos is a mother who has learned of the joy of family art projects – even if that means hours of cleaning afterwards.